if (currentState == 0){
doAthing;
} else if (currentState == 1){
doBthing;
}
A common problem I see pop up on facebook groups is “how can I get my program to do this at one point, then something else at another point?”
Welcome to the world of State Machines!
I don’t think I write any code any more that does not use this concept at some point.
Also in this lesson, we will discuss stating the problem and the intent of your code, in order to help you communicate to others its function, and to help develop your own debugging skills.
Stating the Problem
First we will state the problem we want to solve. This really should always be the first thing we do before we write any code, but especially if we get stuck, having our intent written down will be invaluable, not just because it will make us think about our intent and how the code we are writing relates to this intent, but also because it gives us a written instruction to others we might be asking for help. One day it may even form part of the relationship you have with a client or as part of a group or shared project.
The Problem:
The task is to produce a headlight / indicator that toggles a white LED on & off when Button A is pressed.
When Button B is pressed, an array containing 4 yellow LEDs will be lit sequentially, then turned off together after the 4th has switched on. This will continue in a loop for 5 seconds or until Button B is pressed again.
This description gives us all the info we need to write the program from scratch. If we were struggling to make our code work, we could show someone this, and they will be able to understand what our intent is, even if the structure of our program is wildly different from anything that could work.
This seems like a very simple, basic thing to do, but I would urge anyone who is stuck writing a program, to write this sort of statement out as part of their debugging procedure. Stating our problem precisely in written language, will help us think precisely about our code language too.
We will use our description of the problem above to explore one way of approaching a coding task like this.
Introducing State Machines
“A state machine is a behavior model. It consists of a finite number of states and is therefore also called finite-state machine (FSM).
Based on the current state and a given input the machine performs state transitions and produces outputs.”
Sounds kinda complicated, but we don’t need to go heavily into the theory, the important takeway is to start thinking of our code as being in one of several possible states.
A state could specify any number of different things. In a simple state machine with a single LED, we could have two states. LED on, and LED off, but we could add a 3rd state, flashing, or a 4th state, fading as well.
To implement our simple state machine, first we will create a global variable to track our current state.

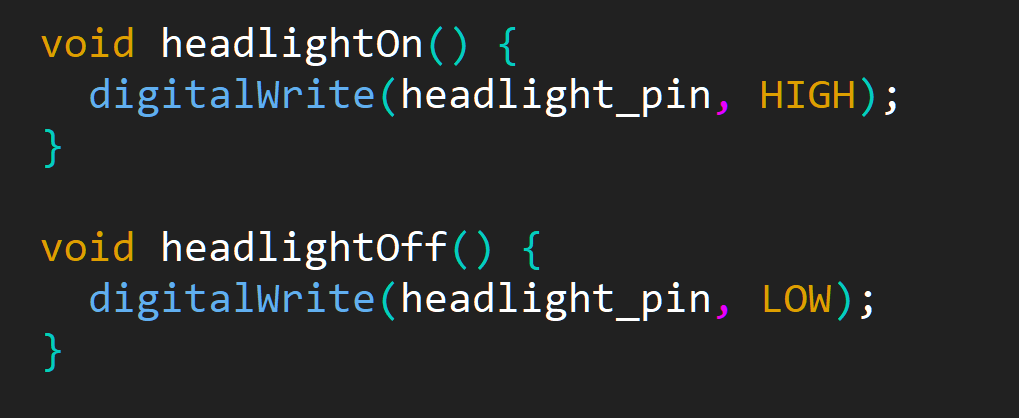
We can then write a function for each of the states we want our headlight to occupy. (N.B. If you are not yet comfortable writing and using functions, please see lesson one in this series)
Then we need a decision tree which will apply the state based on our state variable. We can use if statements or a switch case for these. I have seen lots of conflicting info regarding which is faster for the controller to process. My advice is use whichever method you are most comfortable with.
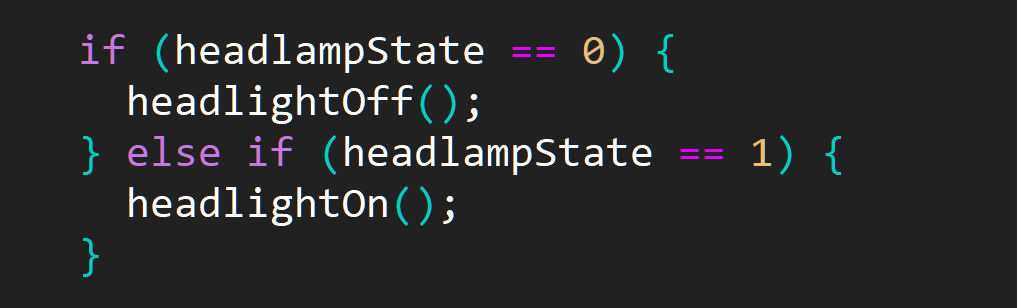
Note, it is best practice to end a series of if statements with an else { } statement with no qualifier. This acts a default value incase our state variable ends up out of bounds for the options we have listed, which would cause a program loop with no exit.
This decision tree could be wrapped into its own function, I would call it headlampLoop(); or something similar, because this function should be run constantly inside our void loop();
Now to change the state of the lamp we just need to change the variable headlampState, if we are following our “The Problem” statement above, we would use a button press, but it would be really simple to change this variable using an analog read and an LDR (light dependent resistor) to detect darkness, or we can do both of these options together.
Writing code this way may seem to be an over complication for such a simple program, but when we start adding lots of different states, and each one is changing many different variables, structuring our program like this will make it so much easier to track, understand and modify.
State Machine Basic Framework

Once we have the state machine framework, its very easy to expand functionality using the same framework, we can write a new function, or set of functions that relate to our new state, we add calls to these functions to our switch case or decision tree, and finally we add some way for the program to enter into that state.
Writing the code in this way separates the functions for “setting the controller into the desired state” and “the action that changes the state”.
In this example we have said the state will change on a button press, but to change this we just need to swap out a single function, rather than pick apart and re-write our code.
In a complex state machine, we could have hundreds of states, and each state could perform many different tasks or change many different variables, but even in simple programs, thinking about implementing your idea using a state machine will help you increase the complexity of the code you are writing, while also making it easier for yourself and others to understand.
Adding The Indicators
To expand this tutorial slightly, and finish outlining the code specified by our problem, we will add the code for the indicator light.
In this case, we will imagine we have the 4 yellow LEDs for the indicator light on pins 3 to 6, so we could specify these as an array.

We will use a second state variable to keep track of whether our indicator is on on off.

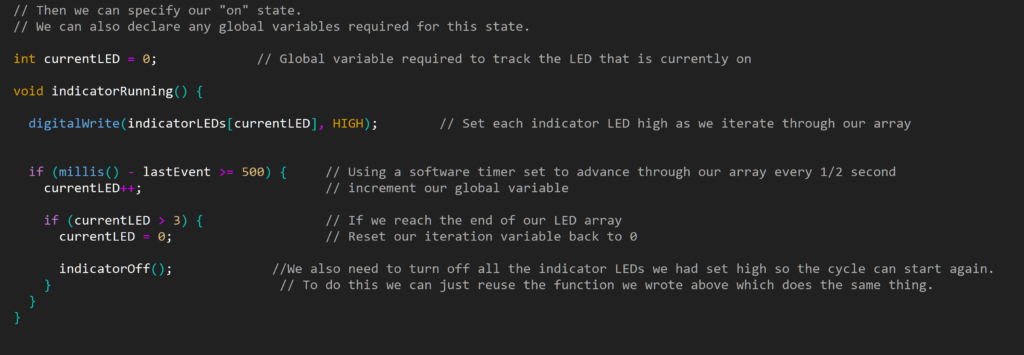
Then we can specify the functions for the two possible stable states. Here we are abstracting the behaviour of a state machine slightly, as each individual LED in our array can be on or off, but we don’t need to go into that much detail. Our states will be indicatorRunning(), and indicatorOff().

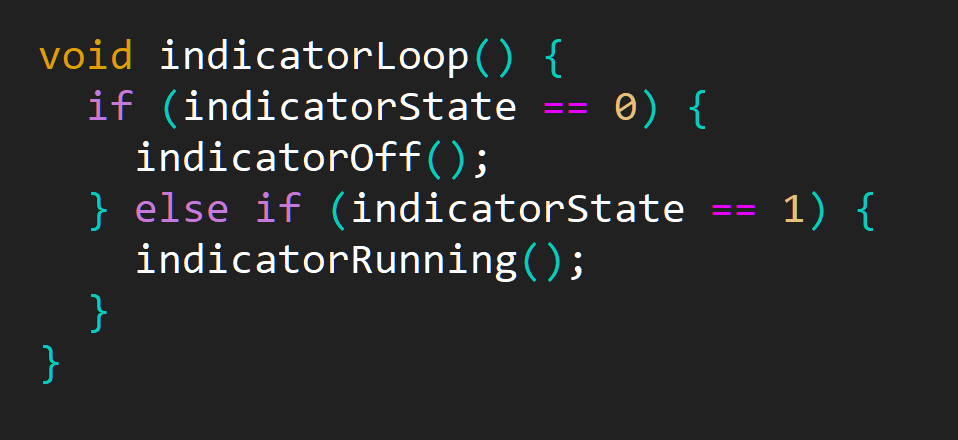
Our Decision Tree / If Statement block is going to look almost identical to the block we wrote for the headlamp. This time I will show it wrapped up in a function. Once again, this function will just run in our void loop();
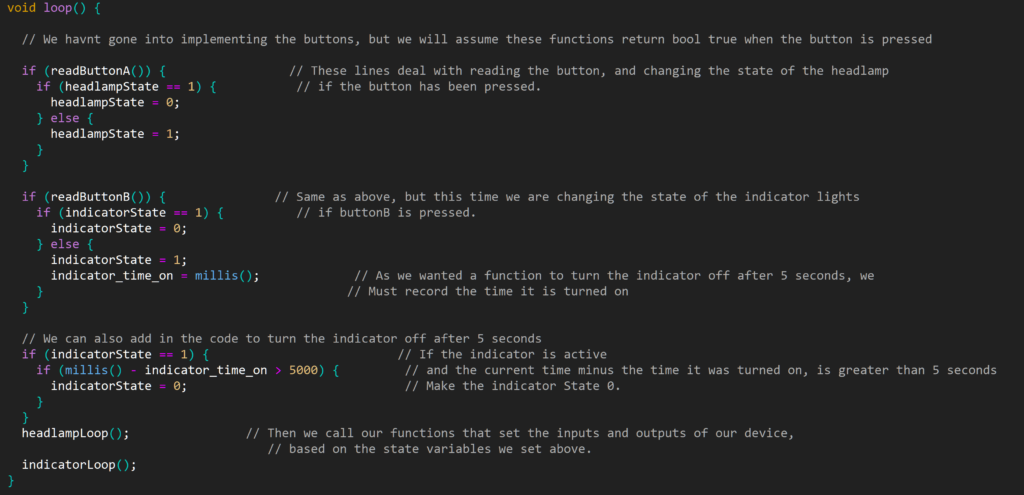
So now our loop would look something like this. I have added some functions that would read a button and change our state variables if the button has been pressed, and I have added a quick script that turns the indicator state back to “0” after 5 seconds of it being “1”.
And we are done. The function of this program should match our stating the problem, and it was easy to build up stage by stage while thinking about the problem as two independent state machines.
Now think about how easy it would be to implement extra states within this framework. Could you add a state where the headlight flashes? Could you modify it to turn on automatically when it gets dark? How about adding a 3rd light, say a red brake light which only turns on when the button is pressed, and turns off when it is released? Adding an almost infinite number of behaviours and options should be simple as apple pie!
I hope you found this interesting and useful! Please let me know with a comment or an email if you found this useful, or confusing.