What is a Library?
If you have spent even a short time with the Arduino environment, you may have used libraries, either ones contained within the libraries included with the Arduino IDE, libaries installed via the Arduino Library Manager, or external libraries downloaded from the internet or github.
You probably already know they provide a package of code written to perform some task, like interface with a specific sensor, perform some standardised maths functions or send & receive data via a specific protocol, like SPI or i2c. They can be quite difficult to understand to begin with, however the best way to understand how and why they are written the way they are, is to start writing our own.
A library can contain all the functions and variables we need to do a specific thing. Once this is done, it can be used and reused, we can build more complex program structures while not having to worry about things like setting up specific functions or timers to interact with hardware, or worry about variables, conflicts, or just coming up with different names for variables that are doing the same thing.
The Arduino platform is based on C++11, which gives us the option to use classes.
A class is the description of a thing. When we construct an object from this class, we are creating an object which inherits its properties from this class.
This concept is known as Object Oriented Programming, or OOP.
If this seems confusing, don’t worry because it can be, but hopefully we can make it clearer using a quick example and learning some theory!
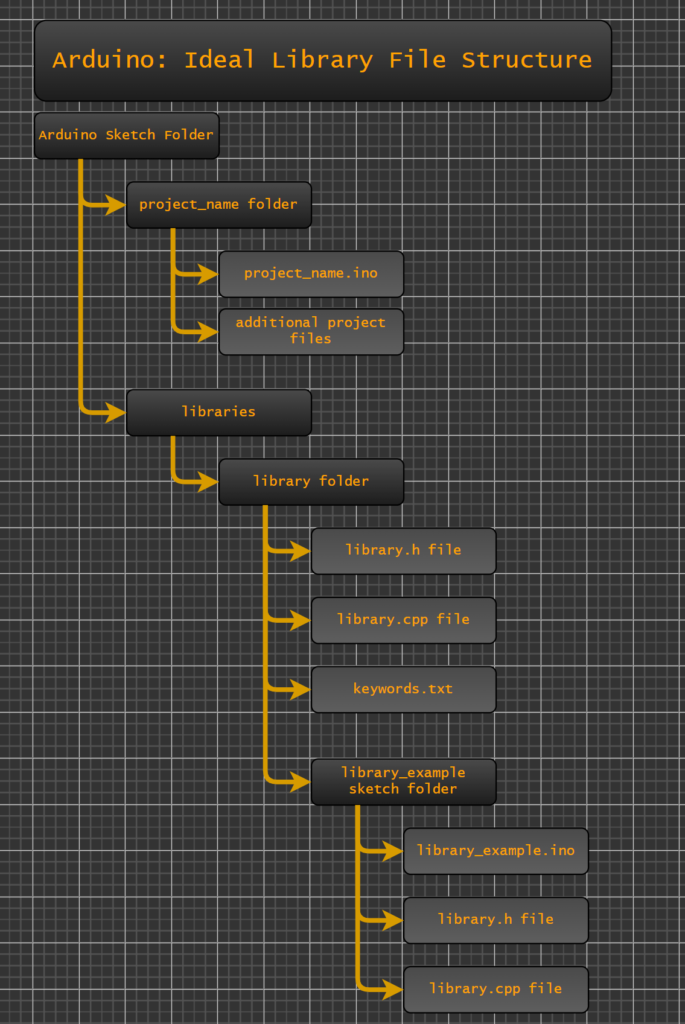
Basic Library File Structure
A library folder requires a minimum of 2 files:
The .h or header file.
This contains the class identifier, the name of our class.
It specifies and names all the global variables we will use within our library, these are called data members.
It declares all the functions and arguments to all of the functions, these are called member function prototypes.
Together the list of variables and methods is called a Class Member List. This is contained within the Class Body.
The .cpp file contains the content of the library, it contains the full Method for each function, i.e. the code that makes up the function.
Other files the library may contain:
A keywords.txt file. This just specifies the keywords which the IDE will highlight in a different colour, it does not affect the function of the library.
An Example folder with an example sketch. When we place our finished library inside our libraries folder, this sketch will show up under the examples tab in the Arduino IDE. This is often the best way to demonstrate to others, and remind ourselves of how to use and implement our library. – Tip: I also put a copy of the .h and .cpp files inside this folder so they can be viewed alongside the example sketch.
There can be many other files contained in a library, but most of them will not relate directly to the function of it inside the Arduino IDE. Library folders can contain multiple header and .cpp files.
Starting Our Library
The best way to understand this is to put it into practice. To do this we will write a library to control a single LED. Alongside this we will write an example sketch to show how we can control 1 or multiple LEDs with this library. It would be best to follow along with this entire example, at the end we will have a library outline that can be used to write your own library in the future.
First, open the Arduino IDE, start a new file and save it as ledObject_example.
Once this is complete, click the arrow in the top right hand corner of the IDE window, and click New Tab. Name this ledObject.h.
Create another new tab and name this one ledObject.cpp.
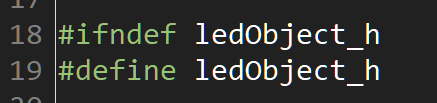
We now have the basic file structure outlined. The next step is to add in the header text. First we will define our header file. Type in the following lines to our header file:
Note 1- the .dot found in the file name is replaced with an underscore _
Note 2 – Any text preceded by a hash # is a precompiler command. These commands define, change and replace text during compile time. Do not end any of these lines with a semicolon, it can lead to unusual behaviour and cryptic fault codes.
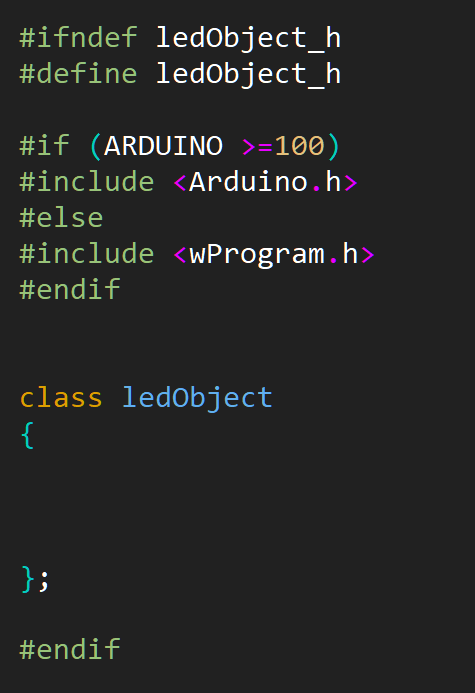
Scroll to the bottom of the file, and add:
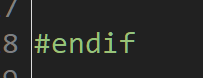
This will be the last line in our header file, our class declaration will go in between #define ledObject_h and #endif.
First the #ifndef line specifies “If we have not defined ledObject.h”
“Define this file as ledObject.h”
This ensures that this text is only included once, if we end up calling libraries that also call this library it will only include one copy. Multiple copies of the same text would throw out duplication errors.
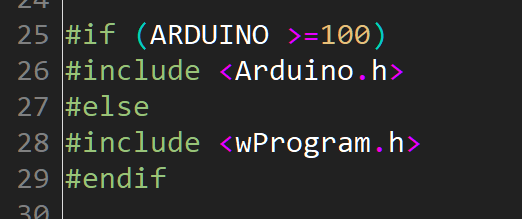
We will also add in the following precompiler if statement and includes. This should be typed below our first #define statement and they ensure that our library contains the basic arduino libraries for backwards compatibility, as these are not always automatically included with library files by the arduino IDE.
We are now ready to start writing our class definition.
Writing a Class Definition
We will approach this in a similar manner to the LED problem tackled in lesson 3, but this time, we will consider the LED as an object instead of just a state machine.
So in this case our class will be named ledObject. Type out the following into our ledObject.h file.
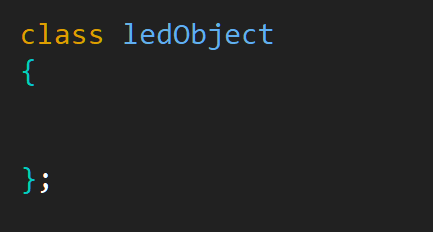
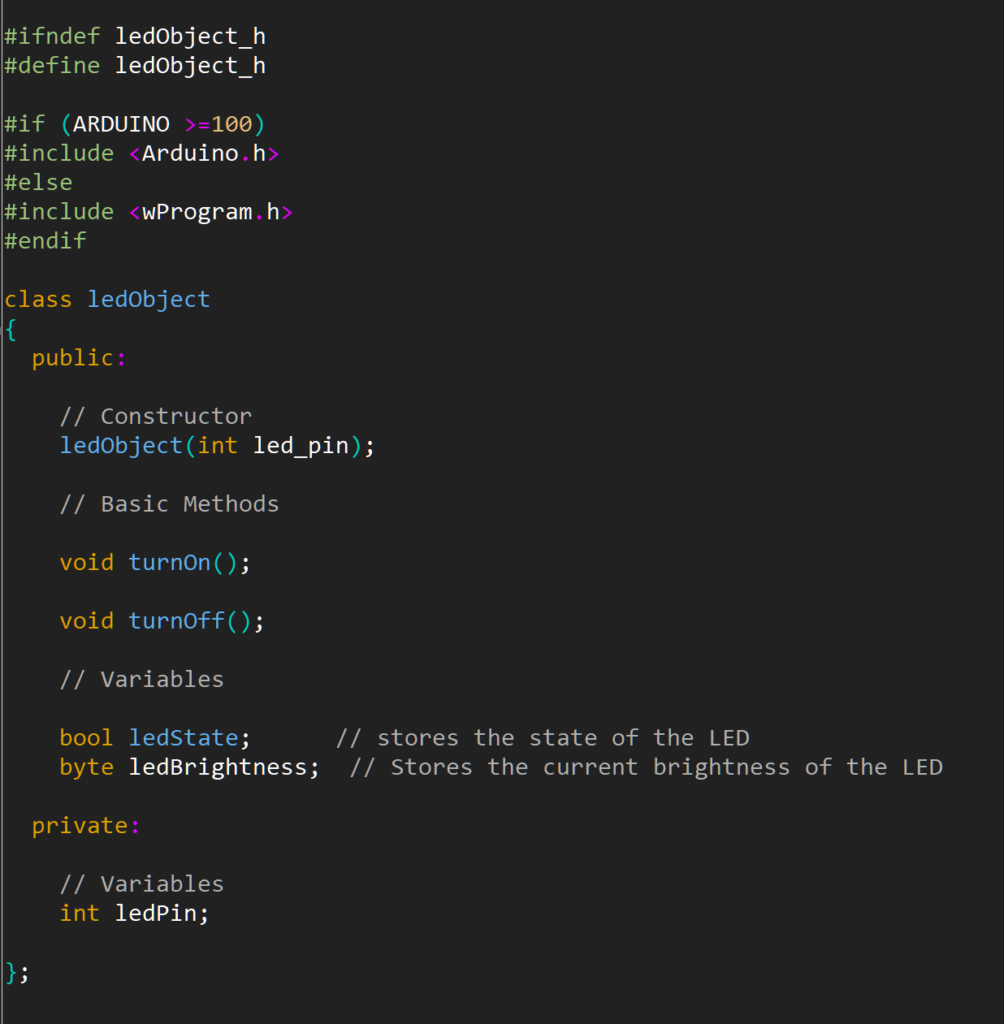
Make sure to include both brackets and the semicolon. Our header file should now look like this.
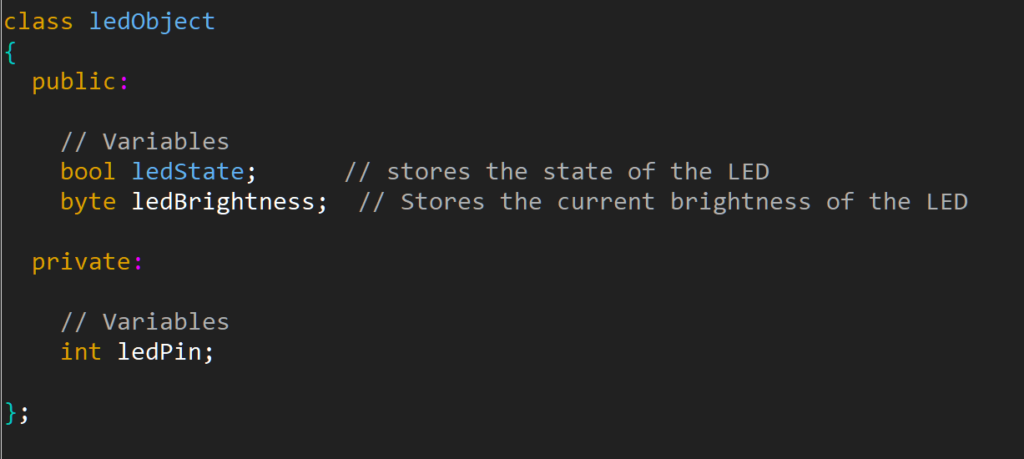
Next we consider the properties an LED has. From our microcontroller and a digital point of view there are 3 pieces of data associated directly with an LED.
- The pin it is attached to (int or byte containing pin number).
- Its current digital State (bool, Low or High).
- Its current PWM or brightness state (byte 0 – 255). (If we attach the LED to a PWM capable pin)
Quick note on Public & Private variables
Class Members are divided into Public and Private. Public members can be accessed by functions outside of the class, private members can only be accessed from functions within the Class Members List.
This allows us to “hide” variables that we want to act in the background, or want to stop anyone using the library from accessing directly. This can also be the subject of a lot of confusion, so for now if unsure we can make a variable public, and it should not affect operation.
The first of these variables is a constant, once this variable is set we do not want to change this value, as we are unlikely to change the pin an LED is attached to. This means we can make this variable Private.
Our other two variables can be Public variables, as we may wish to update this variable directly, or query the object to find its current state.
With this information we can start filling in some variables into our class declaration, under the headings “public:” and “private:”
To invoke an instance of this class as an object, we require some way of specifying what the constant variables are for each instance we invoke, in this case, the ledPin.
To do this, we would need a constructor.
Constructors
Constructors are used to construct an object. In this example the object we construct will be an LED attached to a specific pin on the Arduino board. Once this object exists we can interact with it using methods.
Constructors can be quite confusing for beginners, as there are several valid methods for invoking them. In the next lesson we will cover constructors that do not pass any data to our object, however, the method we will use in this example passes some data to our object.
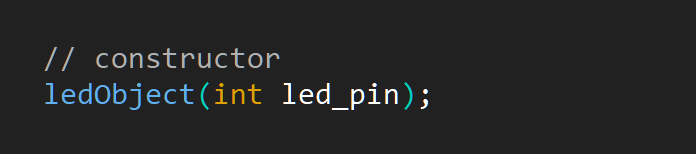
First, in our header file, under public: we can add in the following line.
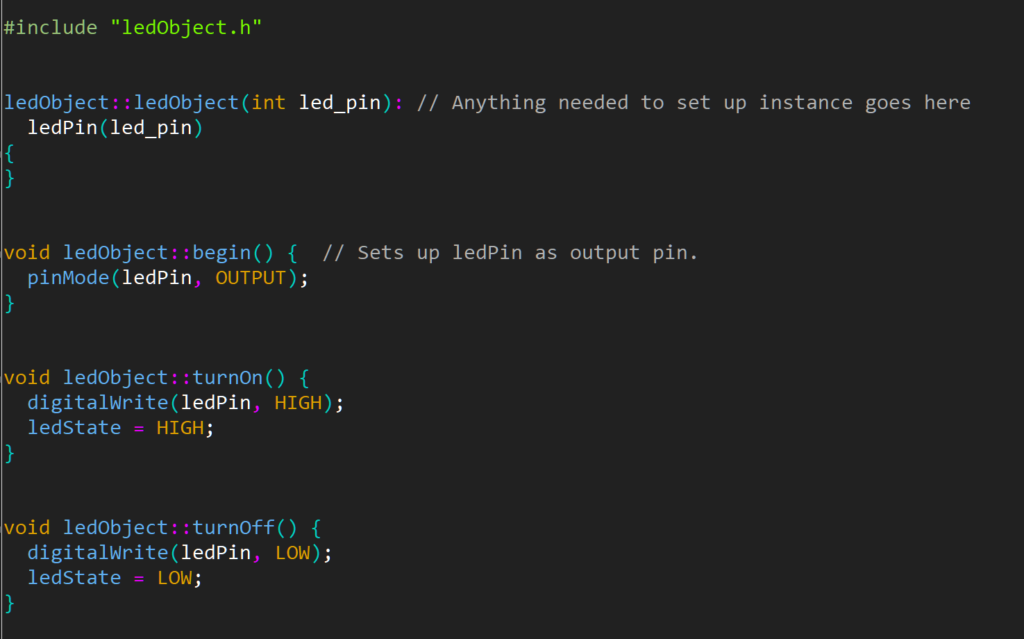
Then we can switch tabs to our .cpp file. The first thing we need to add here is a precompiler command to include our header file.

Then we can add the content for our constructor.
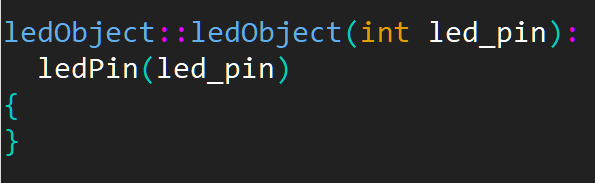
Be careful with the syntax here, make sure you use the correct punctuation. There are a few things that are worth noting here.
First is the name of our constructor ledObject, this is preceded by the name of our class and two colons:: signifying that this constructor belongs to the ledObject class. You will see this structure repeat for every method we include in the .cpp file. A common cause of failures to compile as we write and develop a library will be forgetting to include the “className::” before the name of our methods.
The argument we pass to the constructor, led_pin is a throwaway variable, it is used just once to assign its value to ledPin, so its name is fairly arbitrary it just needs to be different to ledPin. The line underneath, variable(argument) assigns whatever variable we pass as an argument to the constructor, to the variable ledPin.
With our constructor written we can start writing the example sketch alongside building our library.
Starting the Example Sketch
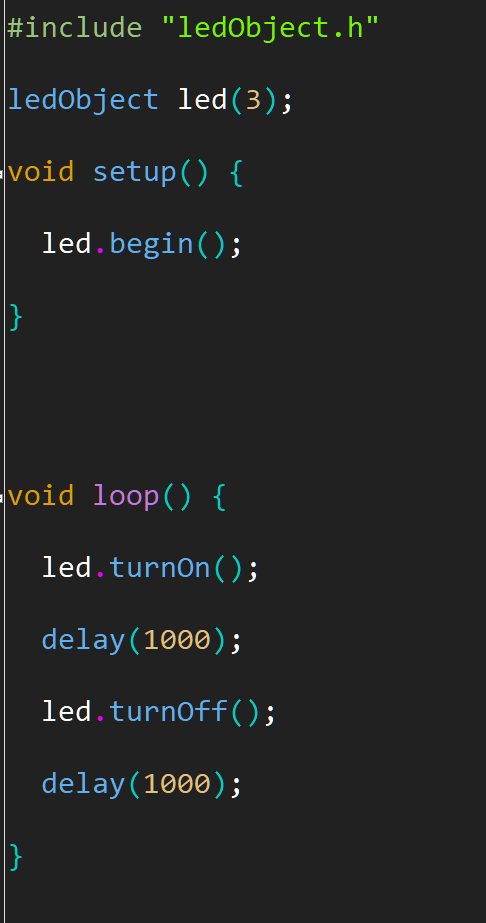
Switch tabs to the sketch page. It may still contain void setup() and void loop(). Above these lines, at the top of the page, we need to add an #include for our header file.

This is the same line we added to the .cpp file, however there is an important distinction to note for the future. Here we have used quotation marks ” ” around our file name. This tells the precompiler to look for the file, ledObject.h inside the same folder that contains this sketch. Once we install our library in the libraries folder, and we are using this library in another sketch, this line should be changed to:

Using < > brackets tells the precompiler to look for the file ledObject.h inside of our libraries folder. But for now keep the line with the quotation marks.
Now our library is included in our sketch file, we can add the object declaration, the constructor. This is declared like a variable would be, outside of any other functions.

Here we have specified that we have a new object that inherits its properties from the ledObject class, and we have given it the name led. This name is arbitrary, we can use whatever helps us identify this specific LED. The argument passed is the pin number we have attached the LED to. In this case I picked 3 as it is a PWM capable pin which will give us the option of fading the LED.
Writing a Begin or Setup Method
So we have started writing our class and we have a constructor. The next most important function is the setup/begin function or method. Just like writing a sketch in the typical Arduino fashion, this is where we specify any task we need to perform once during the setup() function.
A method is just another name for a function that is contained inside an object, if you are unsure about using functions please see lesson 1.
Click back to our header file. Under public:, we can add the following line.

This declaration of a method inside our header file is called a prototype.
Now we can write the code for our begin function, inside the .cpp file.

This time we have declared the method with a data type, just as if we were writing a function in a normal sketch. We have still included ledObject:: as this method “belongs” to the class ledObject. We need to ensure that our method name exactly matches the name we have specified in our header file.
The only code we need to run during the setup is to set the pin the LED is attached to as an output pin.
Now we can move back to our sketch tab, and add in a call to this method in our setup() function.
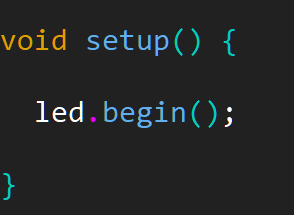
We can now call methods we defined in our library by assigning them as belonging to the object we specified above, led. This is done with objectName.method(); syntax. Note it is the object name, not the class name we have used here.
Finishing the Basic Function
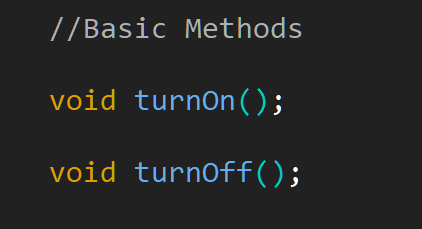
Now we have our begin method, we can add in some functional methods to control the LED.
First we will define them in our header file. Switch back to the header tab and add the following functional member prototypes under public:
Then switch to our .cpp file and we can write the methods to turn the LED on and off.
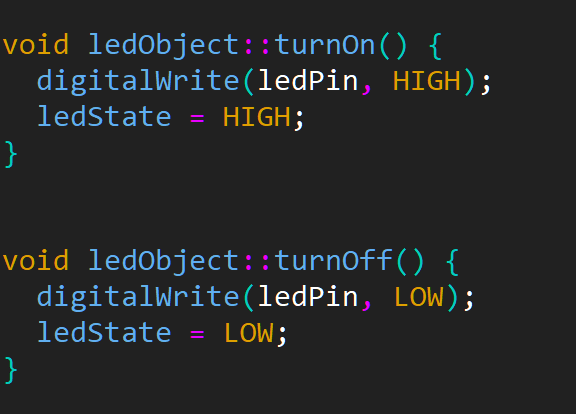
Note again the use of className::method syntax to show these methods belong to the ledObject class. The ledState variable is added for future use. Later we can use this variable to interrogate the state of the LED and make decisions based upon its current state.
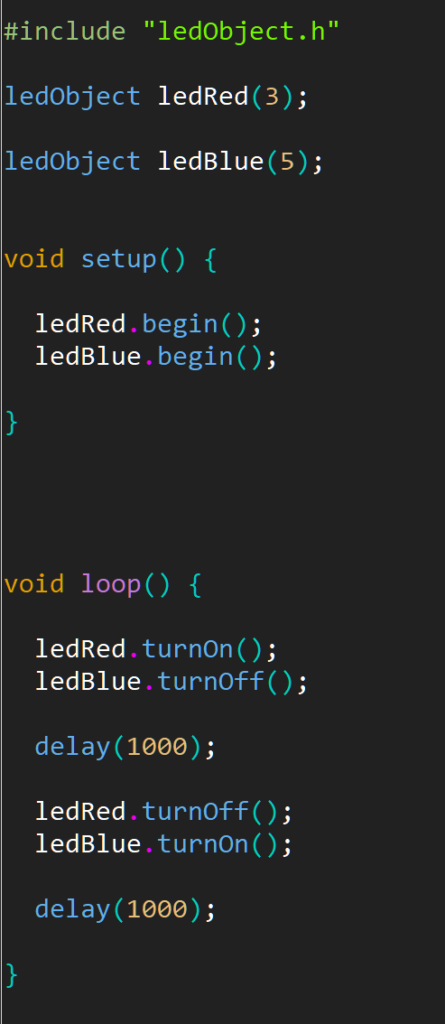
Finally, we are ready to write some functionality into our example sketch. Switch back to the ledObject_example tab, and now we can add in calls to the methods above. We will use delay() in this example so we can see our program doing something.
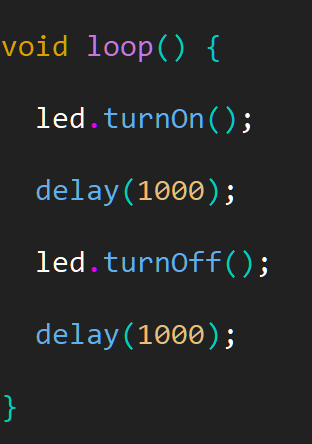
Each of our tabs should now look like the following:
Header File:
.cpp File:
ledObject_example File:
We can now compile and run our code. If we were successful our LED should be flashing once a second.
Seems like a lot of work to re-write the blink sketch doesn’t it! But we can now add as many ledObjects as we like, each one attached to a different pin, without having to modify anything in our library. All that is required is constructing another ledObject by passing our constructor another name, and another pin to attach the LED to. In this example we could make one LED red and one LED blue in order to make a police style flashing light.
We still need to run the begin() method for each ledObject as this initialises the hardware pin as an output. After this adding in lots of functionality is very quick and easy. We can add as many copies of this object as we like, at least until we run out of pins to use. Each one acts completely independently and contains all the variables required to make that object work. For example, now if we wish to know the state of the blue LED, we can access the ledState variable for the blue LED with the following syntax.

When accessing any member of an object, we use the objectName.member syntax.
Improving Library Functionality
How we have some basic methods to turn the LED on and off, we can modify our begin() method to account for an initial state of the LED.
First we modify the method prototype in the header file by adding an argument initialState.

We have also added a default value of 0, so in the case that no arguments are passed to our begin method, the LED will default to an off state.
We can then add in the code required to physically turn the LED on or off during our begin() function, so we will modify the method in the .cpp file.
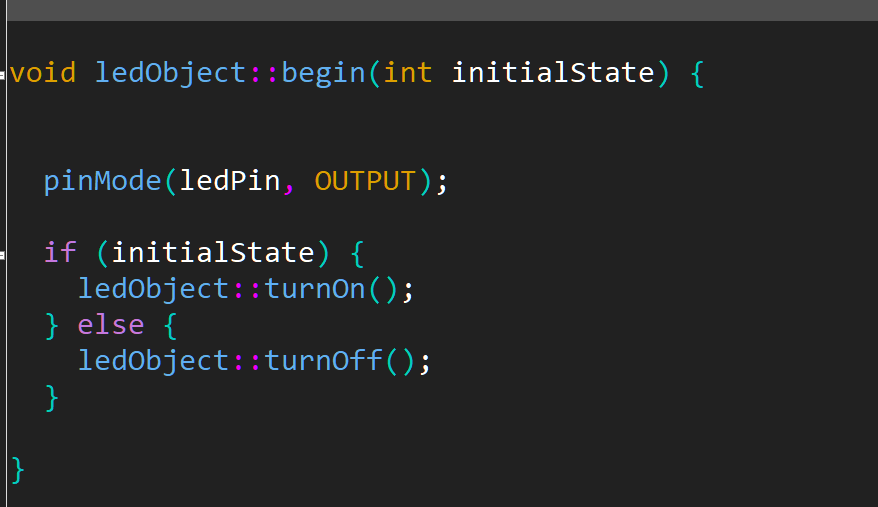
We need to make sure any arguments we have declared in the prototype appear in the method contained in the .cpp file. We should not add in the default value here, this is only specified in the header file.
As we already have methods written to turn the LED on and off, we do not need to directly deal with a hardware function (digitalWrite()), instead we can just call the methods we have already written. As this method is a member of the ledObject class, we must use the className::method(); syntax. Note this only applies to methods, variable class members can still be accessed from within methods contained within our class by calling them directly, as we will see in the next example.
Expanding Library Functionality
So far we have some basic functionality, however we can improve our library and make it applicable to far more situations by adding additional methods to control the LED in different ways. The most obvious one would be a toggle command, if the LED is on, turn it off and vice versa.
Again we start by adding the prototype into our class body in the header file.

And add the method into the .cpp file.
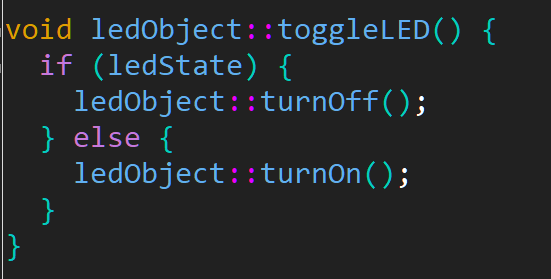
We are able to use the methods we outlined before again, so we can start to see just how efficient with our time this approach to writing code can be.
Now if we go back to our example sketch, we can rewrite our police lights code using our new begin() and toggleLED() method.
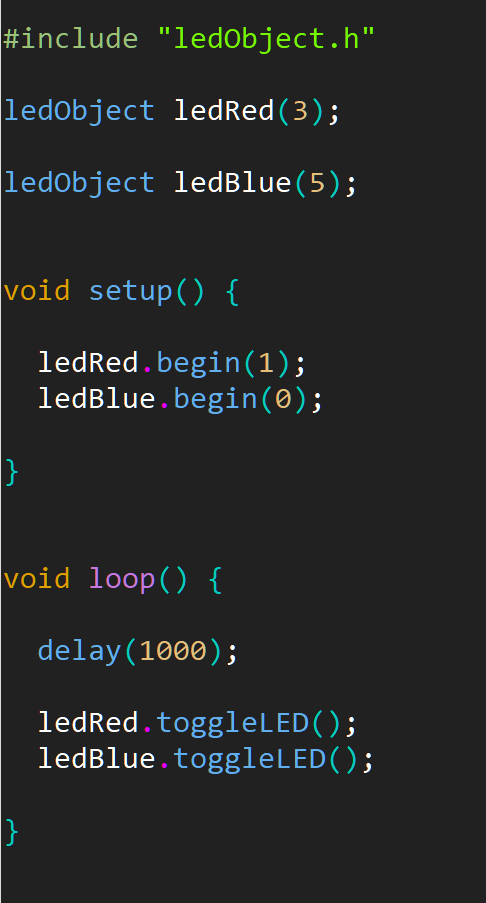
In the setup() we pass a high initial state to one of the LEDs, and a low initial state to the other. Then all our loop needs to do is toggle both of them at some defined interval of time. Look at how efficient this way of writing has become!
Conclusion
So far we have covered some very basic operations and syntax for writing a library, and we have introduced some Object Oriented concepts. Hopefully this has given you enough tools to expand on this idea. In my finished ledObject library I added some functions to flash and fade LEDs at different rates. Try expanding this library to cover some of these functions too. Look at lesson 2: Timers, which covers timing functions without using delay(), it will be incredibly useful for expanding functionality.
In the next lesson, we will write the timing functions covered in lesson 2: Timers into its own library, then in the final lesson 8, we will show how we can include that library inside of this one to use it for timing flashing and fading LEDs. We will also cover moving the library into our libraries folder, and adding a keywords.txt file.
Good luck and happy coding.